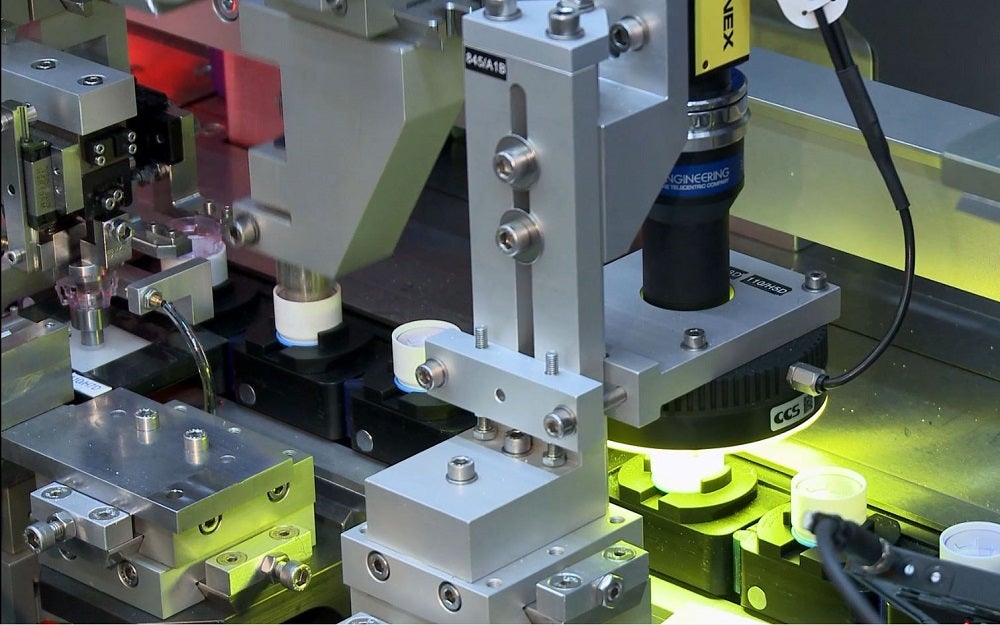
When it comes to manufacturing medical devices, precision is paramount. A huge range of variables or defects could have an impact on a product’s performance and, ultimately, patient safety. Advanced vision solutions use powerful analytical algorithms to offer manufacturers better quality and improved process control than ever before.
According to GlobalData analysis, digitisation will be a key accelerator of growth across the healthcare industry in the coming years, and companies that don’t take advantage of advanced technologies risk falling behind.
Vision and precision
One of the most powerful applications for advanced software in manufacturing is automated quality control processes. By working with a specialised partner, medical device manufacturers can develop highly precise, specific, robust and qualified systems to guarantee their products meet quality standards.
“A vision system uses image information, 2D or 3D, to determine whether a part is good or bad,” says Cédric Wulliens, vision team manager at advanced automation provider Mikron. “It is 100% automated, sometimes replacing jobs that were previously performed by operators on a semi-automatic line.”
Vision systems bring together high-resolution camera hardware with algorithms to analyse parts on the manufacturing line and discard those that do not meet quality standards, based on a variety of criteria.
Automation removes the risk of human error. While operators can become tired and distracted, algorithms are repetitive, qualified and robust. In some circumstances, they can even handle higher levels of complexity and smaller degrees of variability than the human eye.
“Quality control is the main application, but vision systems also play an important role in process control,” adds Wulliens.
For example, high-resolution cameras can be used in flexible feeding and driving a robot to pick up a part to be fed into the machine. Similarly, vision systems can be used to automatically compute the best welding position of a 17-micron-diameter wire.
“For process control, we use vision not as a verifier, but as an essential part of the process,” says Wulliens.
Meeting challenges
When it comes to making decisions in a real-world situation, vision systems must be highly accurate, reliable and validated. Image quality and lighting are key for algorithms to make the best decisions. One of the main challenges for manufacturers is ensuring the image allows for adequate contrast to identify all required features.
On-the-fly analysis provides some of the most robust results. In a pallet, where multiple products are assembled at once before being transferred to the next station, it can be challenging to ensure a high image quality for each product.
“In the past, we had one image for the four products directly on the pallet,” says Wulliens. “But, in that situation, lighting becomes more difficult because it’s not homogeneous.”
With on-the-fly analysis, one primer camera inspects each part individually, taking multiple images in a row as the parts are transferred.
“On-the-fly is a process of acquiring multiple images of parts being transferred, enabling us to have the same lighting conditions for each part,” explains Wulliens. “It requires a lot of synchronisation and precision, but it’s more robust, more compact and more cost-effective.”
Meanwhile, computational imaging can also be used to inform a clearer decision about the quality of a part by taking multiple shots. Using a set of imaging techniques to combine data acquisition and processing, computational imaging enhances feature contrast, enabling the system to extract more information from the inspected products than a single image allows.
According to Wulliens: “We have been performing computational imaging for several years and today it is getting increasingly complex. We acquire more and more images of a product for inspection, and [we] use them to compute more accurate decisions around its quality.”
Detecting defects
What’s more, vision systems are being challenged to differentiate between defects, types or position/orientation.
“With a cartridge filled with an active gel or liquid, defects on the outside are not as critical because they are not in the product itself,” says Wulliens. “Customers want to have different criteria for defects found inside the product and outside.”
Another complex type of medical device is the ‘mini lab’, where blood or other fluids are introduced to a reactive for analysis inside the device. The device comprises channels that connect cavities, and plastic foil is welded on top.
“It is very important to make sure it is correctly sealed to ensure there is no contamination between channels,” says Wulliens. “We want to be able to verify defects that go through or partially through the weld, which are critical for the product.
“We have developed an algorithm that can inspect the direction and size of the defect against the size of the channel.”
Some of the most challenging quality distinctions can be handled by artificial intelligence (AI), although its use is dependent on the complexity of the system. Applications might include identification, variance distinction and classification.
For example, the algorithm may have to distinguish between different types of defect on a product’s surface, or, since some are more critical defects than others, a customer may want different tolerances between them.
Supported by the latest digital advances, Mikron is developing a vision solution that can distinguish between these classes.
The road to better vision
Mikron began developing vision systems more than 20 years ago, with a team of dedicated vision engineers. The team has now grown and been spun off to other countries, but the key to success remains the same: “We build up these systems together with the customer,” says Wulliens.
“It is very important that the customer is integrated into the discussion so we can understand their needs and develop specific solutions accordingly.”
To find out how to integrate powerful vision solutions into your manufacturing operation, download the whitepaper below.


